Editing E-Invoice Data Entered In GSTR-1
GSTR-1 is a type of GST return that consists of outward supplies details. GSTR-1 can be filed by the taxpayer on a monthly or quarterly basis. After the implementation of e-invoicing, the e-invoice data gets auto-populated in GST returns including GSTR-1. So through this, you can know how to edit e-invoice data entered in GSTR-1.
Editing E-Invoice Data Entered In GSTR-1 Offline
Step 1: Open the GST Portal and log into it.
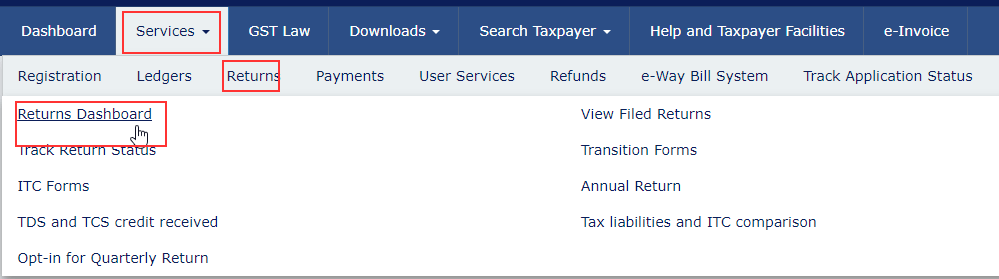
Step 2: Choose the Returns option available under Services.
Step 3: Then go to the Returns Dashboard.

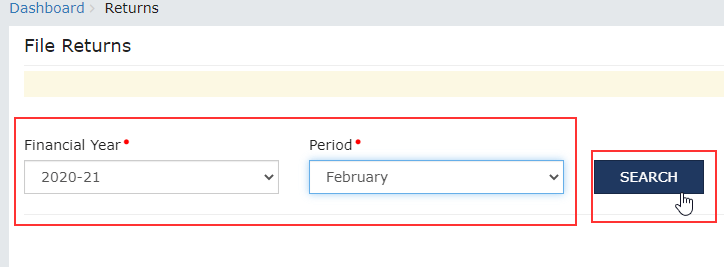
Step 4: Click on the Search button after selecting Financial Year and Period of Return.

Step 5: View outward supplies details of goods or services after clicking on the Preview button.
Step 6: Similarly, you can also download E-Invoice Download History from the Download button available at the bottom of GSTR-1.

Step 7: To download the excel file, you need to choose on the Click here to Download Link.
Step 8: Open the downloaded excel sheet to view the e-invoice data entered in the GSTR-1. The following tables will get auto-populated in the GSTR-1 using the e-invoice details.
- Table 4A, 4B, 4C, 6B, 6C – B2B Invoices,
- Table 6A – Export Invoices
- Table 9B – Registered Credit/Debit Notes (CDNR)
- Table 9B – Unregistered Credit/Debit Notes (CDNUR)
In case if you want to edit any of the above table(s) click on it.
Editing E-Invoice Data Entered In GSTR-1 Online
In case if you want to edit e-invoice data entered in GSTR-1 online you need to follow the below steps:
Step 1: Open the GST Portal and log into it.

Step 2: Choose the Returns option available under Services.
Step 3: Then go to the Returns Dashboard.
Step 4: Click on the Search button after selecting Financial Year and Period of Return.
Step 5: View outward supplies details of goods or services after clicking on the view button.
Step 6: Click on the Table 4A, 4B, 4C, 6B, 6C – B2B Invoices tile to edit the data available under the GST return dashboard.
Step 7: Under the receiver’s details click on the relevant GST Identification number to access all the invoices related to him. It shall be noted that the user can view the hidden details such as information source, IRN, and IRN date in case if the details are auto-populated from the e-invoice.
Step 8: Click on the Edit button that is available at the bottom of the webpage to edit the column online.
Step 9: Once you are done with the editing click on the Save button. It shall be noted that once the details of the e-invoice are edited IRN and IRN date will disappear.
Step 10: Now to update the invoice details click on the Generate Summary button.