Creating New E-way Bill Through Government Portal
Step 1: Login in the E-Way Bill portal by entering your credentials i.e. Username, Password and captcha code.
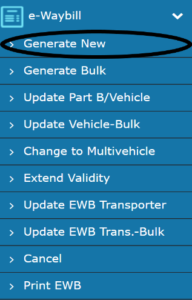
Step 2: Goto E-Way Bill -> Generate New.
An E-Way Bill Entry Form will be opened which requires some details to be entered.
Step 3: SUPPLY TYPE
Select “Supply Type”. There are two options available for Supply Type – Outward and Inward.
- Outward – Select “Outward” if you are a supplier of goods
- Inward – Select “Inward” if you are a receiver of goods
You have to select Outward/Inward based on your nature of supply/transaction.
Step 4: SUB TYPE
Based on the selection of “Supply Type”, “Sub-Type” options get switched.
a) If you have chosen the supply type as “Outward”, options visible in “Sub Type” are as per the Figure 1.
![]()
Figure 1
b) If you have chosen the supply type as Inward, options visible in “Sub Type” are as per the Figure 2
![]()
Figure 2
Step 5: DOCUMENT TYPE
Select your Document Type as per the document available to you at that time. Document types available are according to the selected Sub-Type of the Supply Type.
- Invoice
- Bill of Supply
- Delivery Challan
- Bill of Entry
- Others
Document No. & Document Date: Enter your document no. and date as written on your Document, selected from Document Type.
Step 6: TRANSACTION TYPE
You have to select the transaction type from the options available in the “Transaction Type” drop-down, which are
- Regular – Movement of consignment is done directly between Consignor and Consignee. (2 parties involved)
- Bill To – Ship To – Billing is done between consignor and consignee but movement of goods is done to the third person/party. (3 parties involved)
- Bill From – Dispatch From – Billing is done between consignor and consignee, but movement of goods takes place from third party to the consignee by consignor. (3 Parties involved)
- Combination of both – Billing is done between Consignor and Consignee but the movement of goods is done by the consignor from third person/party’s place to the fourth person/party on the request of Consignee. (4 parties involved)
Step 7: BILL FROM – DISPATCH FROM & BILL TO – SHIP TO
- When you select “Outward” as Supply Type, “Bill From” and “Dispatch From” section gets filled with your own registered details.

- When you select “Inward” as Supply Type, “Bill To” and “Ship To” gets auto populated with your own registered details.

- Enter URP in GSTIN if consignee have no GSTIN.
- Enter 999999 in pin code if your Address not in India. When you enter valid pin code, state will be auto populated.

- For export or SKD/CKD/ Lots Export, enter address and pin code of the port from where the goods are going out of the country.
Step 8: ITEM DETAILS
Here, enter the details of the goods to be shipped.
- Product Name – Enter the name of goods that you are going to ship.
- HSN – 4-digit HSN is required.
- Unit – Enter 3-digit Unit code. Refer the same from Unit Code List.
- Other Amount (+/-) – You need to enter the discount value in the other amount. Always remember while entering the discount value, you have to enter minus sign (-) otherwise your discount will not be applied.
- Either add CGST or SGST depending on the Place of Supply.
NOTE:
Sum of Total Taxable Amount, CGST, SGST, IGST , Cess Advol and Cess Non-Advol should be equal to or less than Total Invoice Amount. A grace value of Rs 2.00 is allowed.
Step 9: TRANSPORTER DETAILS
Transporter Id – You have to enter the Transporter GSTIN or Transporter Enrollment Id TRANSIN here.
Transporter Name – Transporter Name gets filled if a valid Transporter GSTIN or TRANSIN is added.
Approximate Distance (in KM) – You have to enter the approximate distance between the consignor and consignee’s location/place in Kilometers.
NOTE:
If Transporter details are added, then EWB PART A will be created that will be valid for 15 days. You will have to update EWB PART B information to obtain validity of E-way Bill.
Step 10: Updating PART – B
Select the mode of transaction by which you are shipping your consignment from the options given and provide the following details:
- Road – Select your vehicle type from “Regular” and “Over Dimensional Cargo” and add your “Vehicle No.”
- Rail – Enter “RR No.” and “RR Date” in the textbox given.
- Air – Enter “Airway Bill No.” and “Airway Bill Date” in the textbox given.
- Ship – Enter “Bill of Landing No.” and “Bill of Landing Date” in the text-box given.
Click Submit when all the details are filled in the form.
You can also see a preview of the details entered in the form by clicking the Preview button.